Showing posts with label Chinese. Show all posts

Tuesday, January 12, 2010

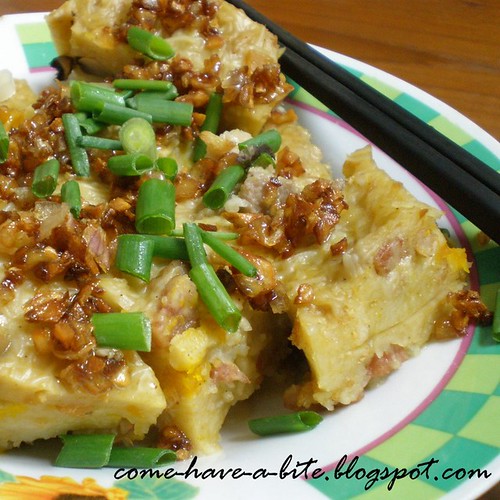
Pumpkin Mee Suah Kueh

Mee Suah or 面线 is a specialty of Xiamen, Fujian. It is a fine dried wheat noodle with a smooth texture & is used mainly in soup. I'm unsure of the origin of this dish but I always loved it whenever my sister cooked this dish. Finally took the chance to take down the recipe so that I can make it on my own.


Ingredients: (Makes 9 inch)

i) Pumpkin Kueh
  • 300g mee suah or 面线
  • 300g pumpkin flesh, shredded
  • 6 shitake mushrooms, soaked and sliced
  • 3 chinese sausages or lap cheong, diced
  • 75g dried shrimps, ground
  • 5 shallots, sliced
  • 5 cloves garlic, minced
  • 120g pork, diced
  • 700mL water*
ii) Seasoning
  • 1 tbsp soya sauce
  • 1 tbsp water
  • 1 tsp sugar
  • 1/2 tsp pepper
iii) Garnishing
  • 1 sprig spring onion, chopped
  • 5 cloves garlic, minced
  • 2 shallots, sliced
  • 1 red chili, sliced
Method:
  1. Soak mee suah in water until softened and keep aside. Heat oil in a wok and sauté shallots and garlic till golden brown. Reserve for garnishing.
  2. Fry minced shallots, garlic till fragrant then add in mushrooms, dried prawns, minced meat, chinese sausages and pumpkin shreds.
  3. Add in the softened mee suah, water and seasonings. Stir well and adjust to taste.
  4. Keep frying until most water has evaporated and everything becomes very sticky or gooey.
  5. Press mee sua firmly into a greased 9 inch tray and steam for 20 minutes.
  6. Garnish with red chilies, spring onions and fried shallots.
*Note: Although original recipe calls for 700mL water, use 500mL water first and then adjust accordingly.


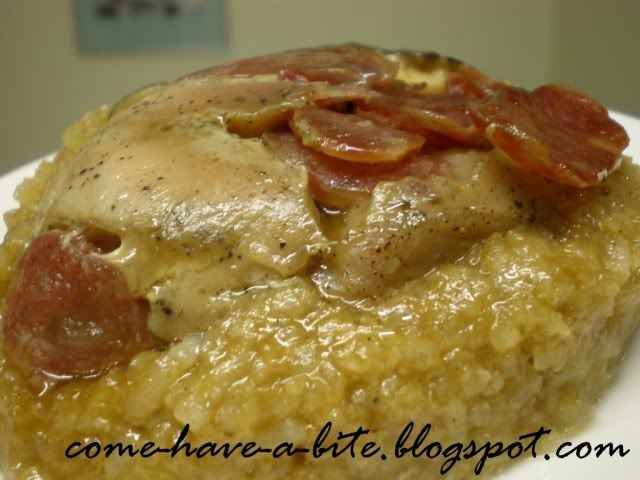
Close up.


Sliced kueh.


After garnishing. Yum yum.

Sunday, December 27, 2009

Four Angled Beans with Belacan

Four angled beans is a type of vegetable that is rarely seen in Australia so I took this opportunity to ask my mom to buy a few. While people think that belacan (shrimp paste) stinks up the whole house, I actually adore this smell. Weird, I know.


Recipe adapted from Delicious Asian Food.

Ingredients: (Serves 5)
  • 300g four angled beans, cut into 3cm slices
  • 50g dried prawns
  • 3 bulbs shallots
  • 1 1/2 bulb garlic
  • 4 fresh red chilies, seeds removed
  • 1 tbsp cooking oil
  • 1 tsp sugar
  • 20g belacan/shrimp paste
Method:
  1. Pound or blend dried prawns, shallots, garlic, chilies and belacan until a fine paste forms.
  2. Heat oil in wok. Add paste above and fry on medium heat till fragrant and slightly brown.
  3. Increase heat to high and add four-angled beans and stir fry for about 2 minutes. Whilst stir frying, sprinkle water to keep moist.
  4. Add sugar to taste. Serve warm.

Wednesday, December 23, 2009

Yong Tau Foo

If I'm not mistaken, Yong Tau Foo is a Hakka dish and being half-Hakka my mom taught me how to make this dish. Feel free to omit or add in any vegetables to your liking.


Ingredients: (Serves 4)
  • 300g fish paste
  • 200g pork mince
  • 50g salted fish, diced finely
  • 6 lady fingers/okra
  • 2 medium sized eggplant/brinjal
  • 3 fresh red chili
  • 1 medium sized bitter gourd
  • 3 tbsp preserved black bean sauce
  • 2 tbsp water + 2 tsp corn flour
  • 1 tbsp minced garlic
  • oil
  • 2 sprigs spring onions, chopped
Method:
  1. Mix the fish paste, pork mince and salted fish together. Cut a single slit length ways down the chili and okra and remove the seeds.
  2. Cut the bitter gourd width ways into 1 inch rings and scoop out the middle using a spoon. Cut the eggplant width ways into 2 inches and cut a deep slit in the middle without cutting through.
  3. Stuff the mince mixture into the cavity of the vegetables.
  4. Heat up the oil in the wok. Pan fry the vegetables in batches, mince side down until brown. Plate up and set aside.
  5. To make the sauce, fry the minced garlic and add in the preserved black bean sauce and corn starch mixture. Drizzle sauce over vegetables and top with chopped spring onions. Serve immediately.


After stuffing mince mixture into vegetables.


After pan frying vegetables.


Drizzle sauce, top with spring onions and serve.

Monday, December 7, 2009

Butter Chicken

Every time when my family patronized a particular restaurant, I would insist that we order the 'Butter Chicken'. It happened so often that it reached a point where they got so sick of it. Fine, looks like I had to satisfy my own taste buds by tackling the kitchen then I can have the whole plate to myself.


Ingredients: (Serves 4)
  • 600g chicken breast, diced
  • 1 clove garlic, minced
  • 2 tbsp soy sauce
  • 1/4 tsp ground black pepper
  • 1/2 tsp dark soy sauce
  • 3 tbsp corn flour (extra for coating)
  • 125g butter
  • 6 sprigs curry leaves
  • 5 bird's eye chillies
  • 1 375mL can of evaporated milk
  • 1 cup dessicated coconut
Method:
  1. Marinade the chicken with garlic, soy sauce, pepper, dark soy sauce and corn flour for at least 30 minutes or overnight.
  2. Coat the chicken with excess corn flour and fry until it turns golden brown. Set aside.
  3. Melt the butter and add in the coconut, curry leaves and bird's eye chillies and fry until fragrant.
  4. Add in the chicken and stir for 2-3 minutes. Dish up and serve.


You can also opt to put in salted egg yolk for better flavour.

Saturday, November 21, 2009

Chicken Curry Buns

Quinn is an excellent baker and I was really honoured when she offered to teach me how to make my very first batch of Asian buns using the infamous water roux starter otherwise known as 65°C Tang Zhong.

Seeing that it's my first time attempting to make buns, I'm pretty proud with the outcome and I'm surprised my arms didn't ache from all that kneading.

Thanks so much for the lessons Quinn!


Ingredients: (Makes approximately 11 small buns)

i) Water Roux (Tang Zhong) Starter:
  • 25g bread flour or high protein flour
  • 1/2 cup of water
Tang Zhong is one part of bread flour or high-protein flour to 5 parts of room temperature water, measured by weight. It is cooked until it reaches 65°C and cooled before added into any bread recipes.

Breads with Tang Zhong incorporated in it are softer and remain softer for a longer period without any bread softener added to it. It is the gelatinization of starch in bread flour that causes this when the mixture of bread flour and water is heated until it reaches 65°C. Starch gelatinization helps absorb more water to provide the soft and elastic texture bread. It's all about the chemical reaction, baby! ;)

ii) Bread dough:
  • 195g bread flour
  • 90g cake flour
  • 1.5 tsp instant yeast (6g)
  • 1 tsp salt (6g)
  • 2 tbsp heaped castor sugar (30g)
  • 1.5 tsp heaped milk powder (12g)
  • 1 egg
  • 1/4 cup water
  • 75g Tang Zhong or water roux starter
iii) Filling:
  • 2 tbsp oil
  • 2 tbsp curry powder, mixed with 3 tbsp water
  • 1 big onion, diced
  • 1 sprig curry leaves
  • 200g chicken meat, cubed
  • 2 boiled potatoes, cubed
  • 1 tsp chicken bouillon powder
  • 1/2 tsp salt
  • 3 tbsp water
iv) Glaze:
  • 1 egg
  • 1/8 tsp of salt
Method:
  1. To make Tang Zhong or water roux starter, whisk the bread flour with water in a small pot until well combined.
  2. Using low to medium heat, cook, stirring often until the mixture turns white, starchy or when it reaches 65°C.
  3. For those without a thermometer like me, draw the figure 8 using a whisk. It is ready when it leaves a trail on the surface.
  4. Remove Tang Zhong to a small bowl and cover it with cling wrap touching the surface to prevent skin formation.
  5. This could be kept up to 3 days in the fridge before it turns greyish.
  6. To make the dough, combine bread flour, cake clour, instant yeast, salt, sugar and milk powder in a large bowl and mix well.
  7. Combine egg, water and Tang Zhong starter in a smaller bowl and mix well.
  8. Pour the wet mixture into the dry mixture and whisk until it's no longer whisk-able then transfer onto a clean surface and knead the dough for a minimum of 20 minutes to develop the gluten.
  9. Once it forms a smooth mixture, add in 45g softened unsalted butter and knead till a smooth glossy, satiny ball of dough is formed. Add bread flour only if necessary and very sticky.
  10. Smooth out dough and place ball of dough, seams side down in a lightly greased bowl. Cling wrap it and let it rise until double in size which takes about 30-45 minutes depending on weather and climate.
  11. While waiting for the dough to proof, prepare the filling. Stir fry curry powder mixture, onion and curry leaves in oil until fragrant.
  12. Add in chicken, potatoes, chicken bouillon powder, salt and water and continue stir frying until dry.
  13. Once the dough doubles in size, punch out all air bubbles from dough with your fist and knead it briefly. Weigh each portion of dough to approximately 50g.
  14. Wrap up with the curry chicken filling and seal the seams well to prevent leakage.Very loosely wrap a strip of pandan leaf across the centre of the oblong shaped bun.
  15. Place it on a greased tray. Repeat with remaining buns. Leave it for second proofing and allow it to double in size again.
  16. When size doubles, bake it in a preheated oven at 200°C for 15mins.


Thanks to the Tang Zhong starter, the buns remained soft and fluffy for the next few days. That's the way I like my buns! Thanks for the amazing experience again Quinn!

Friday, November 13, 2009

Baked Turkey Drumsticks

Turkey drumsticks are usually sold quite cheap in the supermarket and I managed to get an even better deal by grabbing hold of 2 large drumsticks for less than $3! Talk about a good bargain.

I've never cooked using turkey before and numerous sources have told me that turkey meat can be quite dry and tough but Google is gold when it comes to finding out about baking times and temperature for turkey drumsticks. The meat was tender and just cooked. No such thing about being dry or tough. :D

It reminds me of the famous 'Siew Ngap' or roasted duck I used to get from Petaling Street back in KL. Yum! Double thumbs up.


Ingredients: (Serves 4)
  • 2 turkey drumsticks (can be replaced with 8 chicken drumsticks or wings)
  • 1/4 cup of soya sauce
  • 2 tbsp oyster sauce
  • 1 tbsp sesame oil
  • 1 tbsp black pepper (I would use only 1/2 tbsp next time)
  • 1 tsp salt
  • 2 tbsp sugar
  • 1 tbsp cornflour
Method:
  1. Marinade the drumsticks with all of the ingredients above in a large bowl overnight.
  2. Preheat oven to 160°C. Place the drumsticks on a baking tray lined with aluminium foil.
  3. Bake the drumsticks for 2 hours to 2 1/4 hours, remembering to flip the drumsticks once.
  4. Drain the marinade and slice the turkey for serving. (I chose not to reserve the marinade because it is too salty unless you're eating it with rice)


*Note: The baking time has been suited for baking turkey drumsticks, if substituting turkey drumsticks, baking temperature and time should vary.

Monday, November 9, 2009

Chicken Corn Soup

Corn was never a favourite of mine as a child but as I grew up, I've allowed my taste buds to step into different territories and now there's almost nothing I don't eat except maybe perhaps for cilantro or coriander. I'm just not a fan of its' strong taste.

Anyway, here is a quick, simple and hearty soup in less than 10 minutes.


Chicken Corn Soup

Ingredients: (Serves 4)
  • 1L of water
  • 400g can of creamed corn
  • 6 tsp of chicken bouillon powder
  • 2 eggs, beaten
Method:
  1. Bring the water with added chicken bouillon powder and the can of creamed corn to a boil.
  2. Lower the heat to allow the contents to simmer for a minute or two.
  3. Gently pour in the beaten eggs slowly.
  4. Turn off the fire immediately and serve.


Enjoy!

Wednesday, September 9, 2009

Ding Hao, Adelaide

This is the favourite Chinese restaurant for my friend and her family to dine and they're sure to visit the place whenever her family is here for a visit. Since her bf came all the way, she thought it would seem appropriate for her to ask us along for dinner.


Spicy eggplant with minced chicken. Wasn't quite what I expected. Was a bit too sour for my liking.


Salted egg with minced chicken and tofu. One of my preferred dished for the night. Would have been better if there was more salted fish.


Stir fry chili garlic long bean. This dish was the hit of the night. Crunchy and packed with garlicky goodness.


Pork belly with preserved vegetables. Flavour was alright but was too stingy on the preserved vegetables.


Smoked tea duck. Your average roasted duck served with hoisin sauce.

Ding Hao
26 Gouger St
Adelaide 5000 SA
Phone: (08) 8211 7036

Entree: $4-$6
Mains: $11-$19
Dessert: $6

Tuesday, September 1, 2009

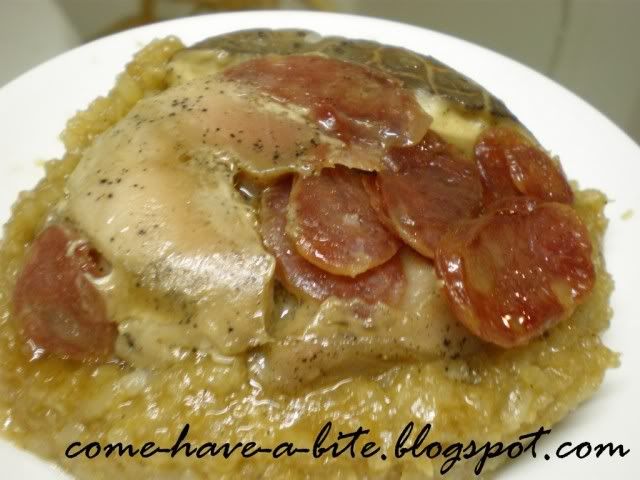
Loh Mai Kai

One of my favourite small dishes is definitely the Loh Mai Kai or Glutinous Rice with chicken. In this instance however, I used pork. The final product came out a bit too wet and the rice didn't have enough flavour but the marinade for the meat was perfect. Well, it is after all my first try.


Recipe adapted from Kuali.com

Ingredients: (Serves 2)
  • 125g glutinous rice
  • 1/3 cup of water
  • 75g pork meat
  • 1 Chinese sausage (Lap Cheong), thinly sliced
  • 2g black Chinese mushrooms, soaked

    Seasoning (A):

  • 1/2 tsp light soy sauce
  • 1/2 tsp sesame oil
  • 1/2 tsp oyster sauce
  • 1/2 tsp ginger juice
  • 1/2 tsp sugar
  • 1/8 tsp pepper
  • 1/8 tsp salt
  • 1/4 tsp Shao Hsing Hua Tiau wine
  • 1/4 tsp dark soy sauce
  • 1/2 tsp oil
  • 1/2 tsp cornflour

    Seasoning (B):

  • 1 tsp light soy sauce
  • 1/2 tsp pepper
  • 1/2 tsp sugar
  • 1/4 tsp salt
  • 1 tbsp oil
  • 1/2 tsp sesame oil
  • 1/2 tsp dark soy sauce
  • 1/4 tsp Chinese five spice powder

  • Method:
    1. Wash glutinous rice, then soak it for two to three hours or overnight. Steam it for 30 minutes.
    2. Cut pork meat into slices. Marinate with seasoning (A) for about one to two hours or overnight.
    3. Heat oil in and stir fry quickly mushroom and lap cheong then dish up. Add cooked glutinous rice and seasoning (B) and water. Stir fry well for five minutes.
    4. Grease two medium-size rice bowls. Add mushroom, a few slices of Chinese sausages and seasoned pork slices. Fill up with glutinous rice and press down with a ladle.
    5. Steam for 30-40 minutes. Turn over the rice bowl onto a plate and serve Loh Mai Kai.


    Hope this will turn out even more delicious for you. :)

    Friday, August 28, 2009

    Sweet potato

    This is the 3rd submission for the Merdeka Open House 2009 held by Babe in the City -KL.

    I like the simplicity and versatility of sweet potatoes. Especially when it comes to making easy but yummy desserts. To prove my point on sweet potatoes' versatility, I'm posting 2 recipes that uses sweet potatoes. :D

    I did not measure the ingredients so I'm writing this based on guess-timation so I apologize if the taste doesn't seem too good but you can always adjust the ingredients to suit your taste buds.

    It was my housemate that got me hooked onto the sweet potato sweet drink or 'Farn Shee Tong Sui'. She said that her mom used to make it very often at home and it gave her very fond memories. Now she passed on this liking of this dessert to me. :P I like the strong ginger taste hence I added more ginger for the flavour.


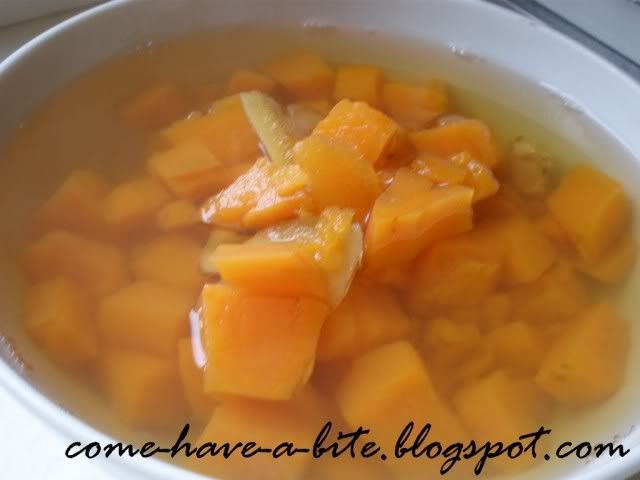
    Sweet Potato Sweet Drink (Farn Shee Tong Sui)

    Ingredients: (Serves 1)
    • 250g sweet potato, diced
    • 2 cups of water
    • 2 inch knob of ginger, crushed or sliced
    • Rock sugar, to taste
    Method:
    1. Bring the water to a boil in a pot and add the ingredients.
    2. Simmer for 15 minutes or until the sweet potatoes are tender.
    3. Serve warm or chilled.
    The next one in line is Bubur Cha Cha. I didn't have yam or tapioca on hand so I made my bubur cha cha purely out of sweet potatoes. It still managed to satisfy my craving nonetheless. :)


    Bubur Cha Cha

    Ingredients:
    (Serves 1)
    • 250g sweet potato, diced
    • 2 cups of water
    • 100mL coconut cream
    Method:
    1. Bring the water to a boil in a pot and add in the sweet potato.
    2. Stir in the coconut cream and simmer for 15 minutes or until the sweet potatoes are tender.
    3. Serve warm.
    Feel free to add in some diced yam or tapioca pearls to further enhance the appearance and taste of this dessert. Hmm... Now I'm craving for another bowl. :P

    Saturday, August 22, 2009

    Pineapple tarts

    Pineapple tarts are definitely one of my favourite Chinese New Year cookies. So, I've finally tried one on my own but I've actually added the wrong amount of ingredients. *slaps forehead*


    Anyhow, here's the proper recipe:

    Recipe adapted from Rasa Malaysia.

    Ingredients: (Makes 12 tarts)

    i) Pastry
    • 5/8 cup of all purpose flour
    • 1/4 cup of butter, softened
    • pinch of salt
    • 1 egg yolk
    • 1 tbsp icing sugar
    • 1/2 tbsp cornstarch
    • 1 egg white (for egg wash)
    ii) Pineapple filling
    • 1 can (440g) of sliced pineapples
    • 4 tbsp sugar
    • 1/2 tsp cornstarch mixed with 1/2 tsp water
    Method:

    1. Drain the pineapple slices and squeeze the extra juice with your hands then blend them for 10 seconds in a mini food processor.
    2. Cook the drained crushed pineapple and sugar on medium heat until most liquid has evaporated and filling turned golden. Stir constantly to avoiding burning.
    3. Add cornstarch to thicken mixture. Set aside and let it cool in fridge.
    4. Preheat the oven to 175°C and cream the butter with a mixer until it is light and fluffy. Add in egg yolk until well combined.
    5. Sift in the flour, corn flour, salt and sugar into the butter mixture. Stir until just combined.
    6. Divide pastry dough and pineapple filling into 12 equal rounds. Wrap/place the pineapple filling in/on the pastry with whichever method you prefer. Here are a few examples:


    The amount of pastry listed in the recipe is calculated for the shortbread style (Pic 3). Doing it other styles would usually result in excess pastry. I did mine the Nyonya style (Pic 4).

    7. Use a fork to make patterns on the tart and brush it with egg wash. Bake for 20-25 minutes or until light brown.

    Enjoy! Here are some photos of the process.


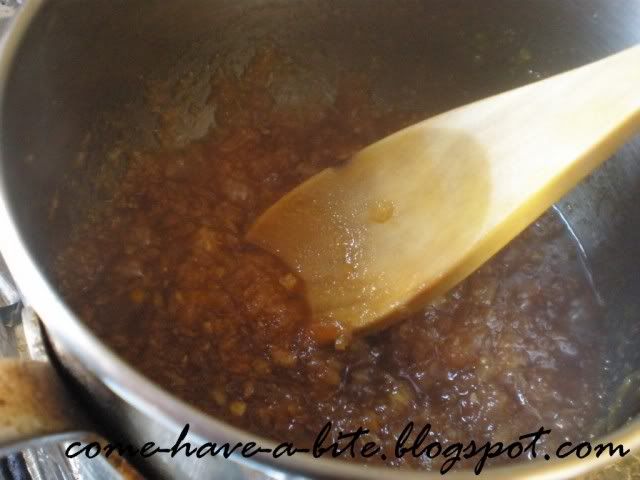
    Preparing the pineapple filling.


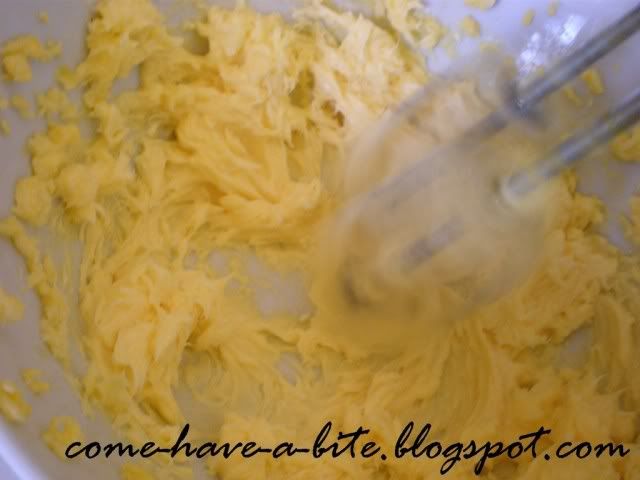
    Creaming the butter.


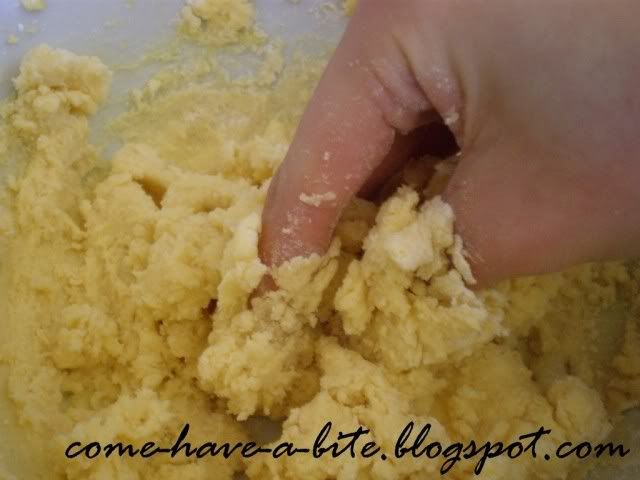
    Rubbing in the flour.


    Before putting into oven


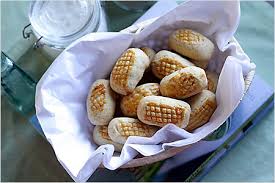
    Final product.

    I know mine looks pathetic. These are skills I definitely need to improve on. Especially when I might be making them again in the future. :)
    Related Posts with Thumbnails