Showing posts with label Snacks. Show all posts

Saturday, December 19, 2009

Cinnamon Twigs

With Christmas just around the corner, this is the perfect recipe for those who are on a tight schedule but needs to whip up something yummy! After all, who doesn't like cinnamon sugar, right? ;)


Recipe adapted from Good Taste.

Ingredients: (Makes about 20)
  • 4 tbsp brown sugar
  • 1 tsp ground cinnamon
  • 1 sheet frozen puff pastry, just thawed
  • milk or egg for glazing
Method:
  1. Preheat oven to 200°C. Line a baking tray with non-stick baking paper. Combine sugar and cinnamon in a bowl.
  2. Brush pastry with milk or egg and sprinkle with the sugar mixture.
  3. Using a knife, cut the pastry sheet in half then cut the pastry into 1 cm thick strips crossways.
  4. Gently twist strips and place on the lined tray. Bake for 15-20 minutes or until crisp and golden. Transfer to a wire rack for 30 minutes to cool.


Use a piece of ribbon to tie 3-4 twigs together to make a small bundle to make a lovely gift.

Friday, December 11, 2009

Tom Yum Cookies

How exotic does these sound?! Everyone shot me a weird look when I introduced them during a gathering but hey, what's cooking or baking without being adventurous eh? ;) Trust me, I was equally skeptical when I stumbled upon the recipe.


Recipe adapted from Taste of Time

Ingredients: (Makes about 20)
  • 325g plain flour, sifted
  • 100g brown sugar
  • 150mL canola oil
  • 3 tbsp Tom Yum paste
  • 8 pieces Kaffir lime leaves, shredded finely
Method:
  1. Mix everything in a bowl until well incorporated.
  2. Scoop out portions using a tablespoon and place on a lined or greased baking tray.
  3. Baked in preheated oven at 180°C for 30 minutes.
  4. Leave to cool completely before storing.


When I first bit into the cookie, my mind was utterly confused and some of my friends said the same. The flavours and texture are good but I probably need a while to get used to this exotic cookie. A few fell in love with it at first bite which is encouraging.

Can you stomach this? Guess you've got to try it to know it. ;)

Saturday, November 21, 2009

Chicken Curry Buns

Quinn is an excellent baker and I was really honoured when she offered to teach me how to make my very first batch of Asian buns using the infamous water roux starter otherwise known as 65°C Tang Zhong.

Seeing that it's my first time attempting to make buns, I'm pretty proud with the outcome and I'm surprised my arms didn't ache from all that kneading.

Thanks so much for the lessons Quinn!


Ingredients: (Makes approximately 11 small buns)

i) Water Roux (Tang Zhong) Starter:
  • 25g bread flour or high protein flour
  • 1/2 cup of water
Tang Zhong is one part of bread flour or high-protein flour to 5 parts of room temperature water, measured by weight. It is cooked until it reaches 65°C and cooled before added into any bread recipes.

Breads with Tang Zhong incorporated in it are softer and remain softer for a longer period without any bread softener added to it. It is the gelatinization of starch in bread flour that causes this when the mixture of bread flour and water is heated until it reaches 65°C. Starch gelatinization helps absorb more water to provide the soft and elastic texture bread. It's all about the chemical reaction, baby! ;)

ii) Bread dough:
  • 195g bread flour
  • 90g cake flour
  • 1.5 tsp instant yeast (6g)
  • 1 tsp salt (6g)
  • 2 tbsp heaped castor sugar (30g)
  • 1.5 tsp heaped milk powder (12g)
  • 1 egg
  • 1/4 cup water
  • 75g Tang Zhong or water roux starter
iii) Filling:
  • 2 tbsp oil
  • 2 tbsp curry powder, mixed with 3 tbsp water
  • 1 big onion, diced
  • 1 sprig curry leaves
  • 200g chicken meat, cubed
  • 2 boiled potatoes, cubed
  • 1 tsp chicken bouillon powder
  • 1/2 tsp salt
  • 3 tbsp water
iv) Glaze:
  • 1 egg
  • 1/8 tsp of salt
Method:
  1. To make Tang Zhong or water roux starter, whisk the bread flour with water in a small pot until well combined.
  2. Using low to medium heat, cook, stirring often until the mixture turns white, starchy or when it reaches 65°C.
  3. For those without a thermometer like me, draw the figure 8 using a whisk. It is ready when it leaves a trail on the surface.
  4. Remove Tang Zhong to a small bowl and cover it with cling wrap touching the surface to prevent skin formation.
  5. This could be kept up to 3 days in the fridge before it turns greyish.
  6. To make the dough, combine bread flour, cake clour, instant yeast, salt, sugar and milk powder in a large bowl and mix well.
  7. Combine egg, water and Tang Zhong starter in a smaller bowl and mix well.
  8. Pour the wet mixture into the dry mixture and whisk until it's no longer whisk-able then transfer onto a clean surface and knead the dough for a minimum of 20 minutes to develop the gluten.
  9. Once it forms a smooth mixture, add in 45g softened unsalted butter and knead till a smooth glossy, satiny ball of dough is formed. Add bread flour only if necessary and very sticky.
  10. Smooth out dough and place ball of dough, seams side down in a lightly greased bowl. Cling wrap it and let it rise until double in size which takes about 30-45 minutes depending on weather and climate.
  11. While waiting for the dough to proof, prepare the filling. Stir fry curry powder mixture, onion and curry leaves in oil until fragrant.
  12. Add in chicken, potatoes, chicken bouillon powder, salt and water and continue stir frying until dry.
  13. Once the dough doubles in size, punch out all air bubbles from dough with your fist and knead it briefly. Weigh each portion of dough to approximately 50g.
  14. Wrap up with the curry chicken filling and seal the seams well to prevent leakage.Very loosely wrap a strip of pandan leaf across the centre of the oblong shaped bun.
  15. Place it on a greased tray. Repeat with remaining buns. Leave it for second proofing and allow it to double in size again.
  16. When size doubles, bake it in a preheated oven at 200°C for 15mins.


Thanks to the Tang Zhong starter, the buns remained soft and fluffy for the next few days. That's the way I like my buns! Thanks for the amazing experience again Quinn!

Sunday, November 1, 2009

Quiche Lorraine

I have this thing for meat pies and quiches. There's just something very comforting about biting into pastry and allowing the savoury and pastry bits dance in your mouth and entice your taste buds.


Quiche Lorraine

Adapted from The Big Book of Baking.

Ingredients: (Serves 4)

Shortcrust Pastry:
  • 1 1/3 cup plain flour
  • 100g cold butter, cubed finely
  • 4-5 tbsp cold water
Filling:
  • 15g butter
  • 1 onion, chopped
  • 4 lean streaky bacon rashers, diced
  • 55g of cheese
  • 2 eggs, beaten
  • 300mL cream
  • pepper
Method:
  1. Preheat the oven to 200°C.
  2. For the pastry, sift the flour into a bowl and rub the butter with only your fingertips* until the mixture resembles fine breadcrumbs. Alternatively, process it in a food processor until it resembles fine breadcrumbs.
  3. Stir in just enough water to bind the mixture to a firm dough. Roll the dough into a ball, place in cling wrap and chill it in the refrigerator for at least 15 minutes to allow the pastry to rest and prevent shrinkage.
  4. Roll out the dough on a lightly floured surface to a round slightly larger than a 9' tart tin. Lift the pastry onto the tin and press it down into the fluted edge. Trim off excess pastry.
  5. Prick the base all over with a fork and place a sheet of baking paper in the pastry-lined tin and fill with baking beans/rice to weigh it down*.
  6. Bake in the preheated oven for 10 minutes. Remove the paper and beans and bake for a further 10 minutes. This process is called blind baking.
  7. For the filling, melt the butter in a frying pan and cook the onion and bacon over a medium heat for about 5 minutes, stirring occasionally, until the onion is softened and lightly browned.
  8. Spread the mixture evenly in the hot pastry case and sprinkle with half the cheese. Beat together the eggs and cream in a small bowl and season to taste with pepper.
  9. Pour into the pastry case and sprinkle with the remaining cheese.
  10. Reduce the oven temperature to 190°C. Place the quiche in the oven and bake for 25-30 minutes, or until golden brown and just set. Cool for 10 minutes before turning out.


Before blind baking.


Out of oven.


* Notes:

- The fingertips are the coolest part of your hands. Using your palm will cause the butter to melt which will alter the texture of the pastry. You want everything to be as cold as possible to result in a short, crispy pastry.

- Blind baking is a method to prevent soggy crust and bottom especially putting in wet ingredients therefore the pastry is baked beforehand. Beans/Rice is used to prevent the pastry from puffing up during blind baking. Be sure to put sufficient beans to press against the sides as the sides may also puff up.

Definitely something I would remake over and over again. After all, you know it's pretty good when you receive thumbs of approval from your family. ;)

Tuesday, September 1, 2009

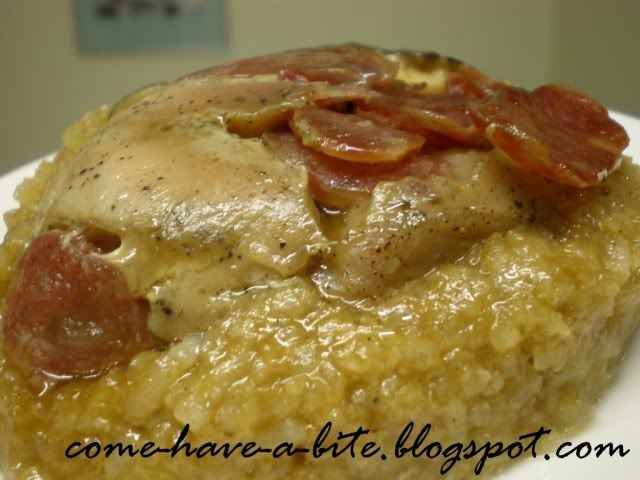
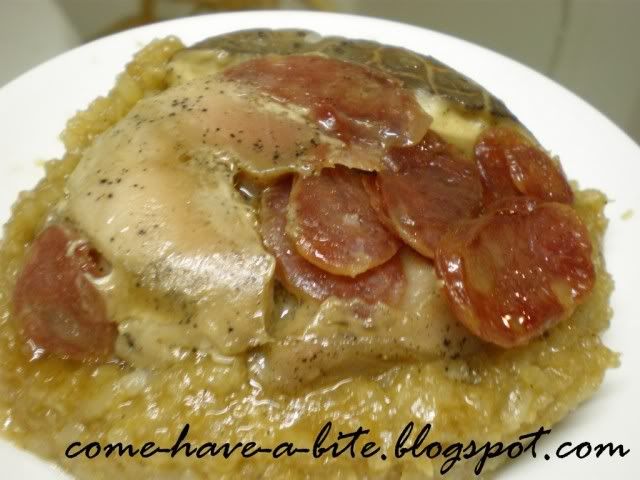
Loh Mai Kai

One of my favourite small dishes is definitely the Loh Mai Kai or Glutinous Rice with chicken. In this instance however, I used pork. The final product came out a bit too wet and the rice didn't have enough flavour but the marinade for the meat was perfect. Well, it is after all my first try.


Recipe adapted from Kuali.com

Ingredients: (Serves 2)
  • 125g glutinous rice
  • 1/3 cup of water
  • 75g pork meat
  • 1 Chinese sausage (Lap Cheong), thinly sliced
  • 2g black Chinese mushrooms, soaked

    Seasoning (A):

  • 1/2 tsp light soy sauce
  • 1/2 tsp sesame oil
  • 1/2 tsp oyster sauce
  • 1/2 tsp ginger juice
  • 1/2 tsp sugar
  • 1/8 tsp pepper
  • 1/8 tsp salt
  • 1/4 tsp Shao Hsing Hua Tiau wine
  • 1/4 tsp dark soy sauce
  • 1/2 tsp oil
  • 1/2 tsp cornflour

    Seasoning (B):

  • 1 tsp light soy sauce
  • 1/2 tsp pepper
  • 1/2 tsp sugar
  • 1/4 tsp salt
  • 1 tbsp oil
  • 1/2 tsp sesame oil
  • 1/2 tsp dark soy sauce
  • 1/4 tsp Chinese five spice powder

  • Method:
    1. Wash glutinous rice, then soak it for two to three hours or overnight. Steam it for 30 minutes.
    2. Cut pork meat into slices. Marinate with seasoning (A) for about one to two hours or overnight.
    3. Heat oil in and stir fry quickly mushroom and lap cheong then dish up. Add cooked glutinous rice and seasoning (B) and water. Stir fry well for five minutes.
    4. Grease two medium-size rice bowls. Add mushroom, a few slices of Chinese sausages and seasoned pork slices. Fill up with glutinous rice and press down with a ladle.
    5. Steam for 30-40 minutes. Turn over the rice bowl onto a plate and serve Loh Mai Kai.


    Hope this will turn out even more delicious for you. :)

    Tuesday, August 25, 2009

    Kuih Bakar

    This is the 2nd submission for the Merdeka Open House 2009 held by Babe in the City -KL.

    If there's a size that I love, it's got to be anything mini. Mini cheesecakes, mini cupcakes, mini tarts... You get the gist. I'd like to believe the guilt and sin comes in mini size as well. :P So I've decided to whip up my own mini 'Kuih Bakar' otherwise known as 'Kuih Kemboja'


    It wasn't very easy but I just made one mini kuih to feed my sweet tooth craving. This tastes just like eating a cripsy kuih with kaya filling minus the egg.


    I didn't follow a recipe and just went with my gut feeling for this one. Easy peasy. Here goes:

    Ingredients:(Makes 1)
    • 50mL coconut milk
    • 15mL of water
    • 1/8 cup flour
    • 1/4 tbsp butter
    • 1/8 tsp sugar
    • pinch of salt
    • a drop of pandan paste
    • 15mL of water
    • Sesame seeds, to sprinkle
    Method:
    1. Preheat oven to 175°C. Mix all the ingredients together in a small bowl until well combined.
    2. Pour the batter into a cupcake mould until almost full.
    3. Sprinkle some sesame seeds on top.
    4. Bake in the oven for 50-60 minutes or until a skewer comes out clean when poked in the middle.


    What it looks like in the centre. It is slightly under baked because I didn't want to poke it for photography purposes and I was too hungry to wait any longer. :P

    Wednesday, August 19, 2009

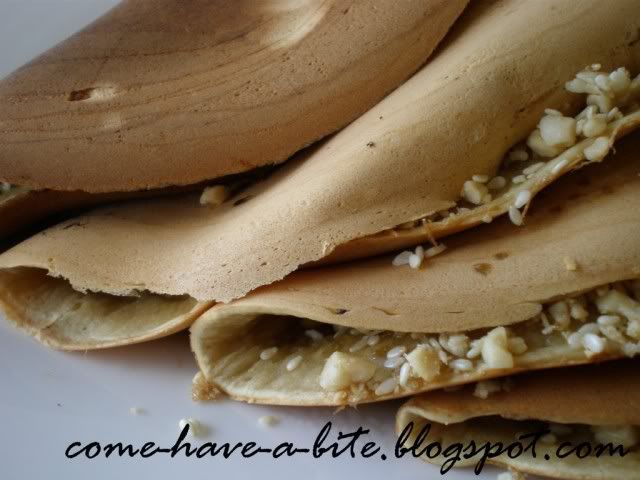
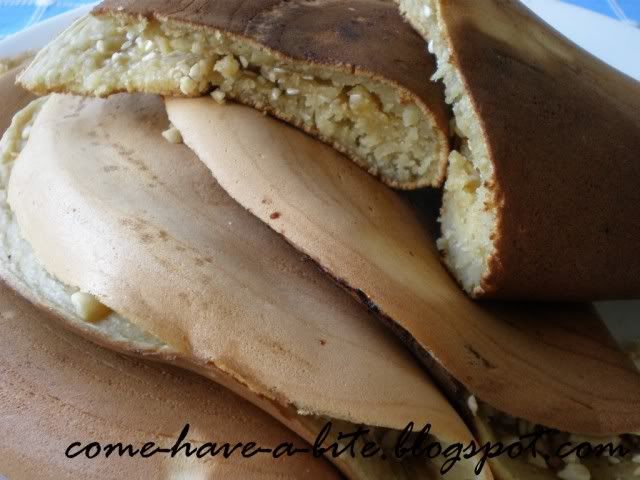
    Ban Jian Kuih / Apam Balik

    I've always loved visiting pasar malam or literally translated as night market with my sister to get our hands on all the yummy snacks and delights.

    I finally had the opportunity to try making one of the snacks popularly sold.


    Recipe obtained from Lily Ng.

    Ingredients: (Makes about 6-10 depending on thickness)
    • 1 egg
    • 225 ml water
    • 1 1/3 cup all purpose flour
    • 2 tbsp sugar
    • 1 tbsp milk powder
    • 1/2 tsp salt
    • 2 tbsp canola oil
    • 1/2 tsp baking soda
    Method:
    1. Whisk the eggs, pour the water and keep stirring until it bubbles.
    2. Fold in flour, sugar, milk powder and salt until the ingredients are combined. Then stir in canola oil. Leave to rest for 30 minutes.
    3. Heat fry pan on medium heat. Add in baking soda and whisk well to combine.
    4. Pour batter into fry pan which has already been warmed. Pour less batter if you want it to be thin and crispy. (I made mine soft and chewy)
    5. Using the base of the ladle to swirl the batter in a circular motion so that the sides of fry pan has a thin coating of batter which will be crispy when it is done.
    6. Cover the fry-pan with a fitting lid. Cook it until the surface has pores. Melt some butter on the ban jian kuih and dust it with sugar, crushed peanuts and sesame seeds.
    7. Cover the pan again until well done. Fold it into half and serve onto plate.
    *Alternatively, you can use buttery sweet creamed corn as filling.


    The key is to be VERY generous with your filling. From the picture you can tell I was being extremely stingy.


    Extra, extra melted butter please! :D Oh, and I can imagine how yummy it would taste with buttery sweet creamed corn too.

    Sunday, August 9, 2009

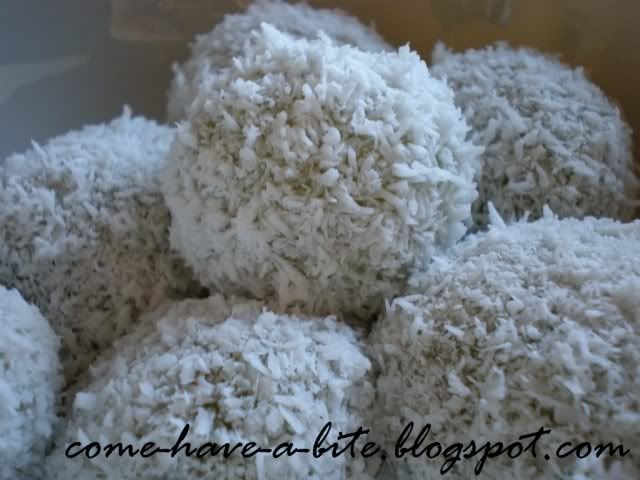
    Onde-onde

    This is an event submission for the Merdeka Open House 2009 held by Babe in the City -KL. The theme for this year is 'My Sweet Malaysia' and selecting a dish to make was particularly difficult as there were so many things I wanted to try out.

    I eventually settled with making the good ol' onde-onde that could almost never go wrong. The first time I made onde-onde I was racing against time and resulted in sloppy onde-onde with leaked out palm syrup. Argh!

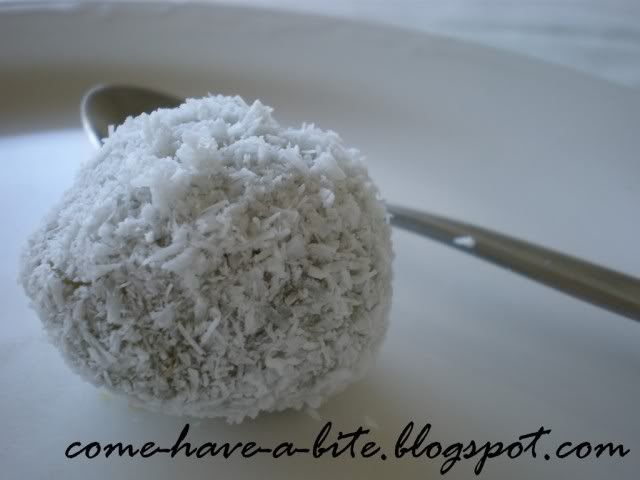
    This time was made with ample amount of time and they turned out perfect.


    Looked less green because pandan juice was used instead of pandan paste.


    The anticipation.


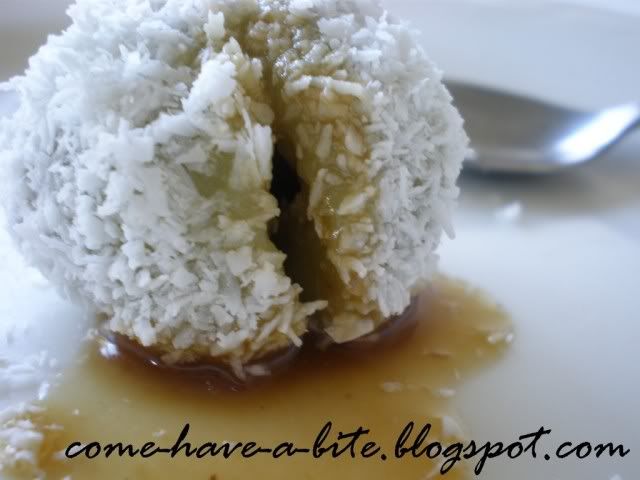
    Palm syrup goodness!

    I had a good time licking off palm syrup off the plate. Yum!

    Ingredients: (Makes 8)

    80g Glutinous Rice Flour
    15g Tapioca Flour
    Pinch of salt
    60ml Pandan Juice
    1 tsp Oil
    35g Gula Melaka
    Dessicated coconut, to coat

    Method:
    1. Mix together glutinous rice flour, tapioca flour and pandan juice until combined.
    2. Pinch out a ping pong sized dough, flatten it and place it in boiling water.
    3. When it floats, scoop it out and combine with the rest of the dough.*
    4. Knead the dough until everything is incorporated and a smooth dough is formed. If dough is too dry, add in more juice and if dough is too sticky, add in more glutinous rice flour.
    5. Divide the dough into 8 ping pong sized balls. Flatten each ball and put a teaspoon of gula melaka into the centre.
    6. Enclose the filling and roll it up to form the onde-onde balls.
    7. Drop the onde-onde balls into boiling water. The onde-onde balls floating is an indication that it is cooked. Cook for a further 2 minutes to ensure that the sugar is all dissolved and syrupy.
    8. Remove the ready onde-onde balls and drop them into a bowl of cold water.*
    9. Scoop up the onde-onde balls with a perforated ladle and toss in dessicated coconut to serve.
    *This mixture of cooked and raw dough is meant to stabilize the dough. This additional processes will also helps the glutinous rice ball to be more chewier.

    We did this twice. Once substituting tapioca flour for corn flour. The one with corn flour resulted in a harder texture while the one with tapioca flour produced a softer, fluffier feel. Now we know, no substitution. ;)

    Despite everything that's happening in Malaysia, it will always be the place I call home. Happy 52th, Malaysia!
    Related Posts with Thumbnails